Table of Contents
Changelog
- 2025-06-15
- Initial publication
Mirrorless Camera Videography
This post is a collection of my notes on how to use a mirrorless camera for videography. These notes are specific to the Sony a6500 mirrorless camera but should be adaptable to other models and brands.
This is more of a breakdown of useful information in a terse form.
Important
SD card needs to be SDXC Class10 or UHS-I to record video with below settings
To help prevent / reduce overheating issues: fold LCD out and away from the main camera body
Video Recording Without Limits
- Setup a capture card to capture HDMI output
- Use an external power source for the camera
Tip
A dummy battery or power over micro-usb port are ideal choices for this
- PC can be used with OBS Studio
Tip
Be sure to setup / activate a dedicated profile for recording
- An Android phone can be used for capture / monitoring
- Best app: USB Camera Pro Android app
Danger
Important app considerations
- The 4GB file size limit option does NOT work on some phones. It’ll save the first chunk of video then silently fail to create new files. You’ll only know it’s broken when stopping video after the first file is saved when it throws an error and starts failing to record outright. Restarting the app clears the error.
- USB disk blips / hiccups can glitch recording and/or cause disk corruption.
- Record to phone storage if desired for stand alone setup
- Use a USB-C OTG, powered hub (Anker, similar) for longer recording sessions
- Power the hub to provide reliable, persistent power
- Connect external disk to USB hub
- Connect capture card to USB hub
- Best app: USB Camera Pro Android app
Recording Kit
The kit listed below is broken up into ’types’. These type groupings are present to ensure it’s clear which kit is wise to by together and to help with ‘growing into’ a more robust video recording setup over time.
Essential Kit
This is the bare minimum kit needed to achieve the video recording setup put forth in this document
- SD Card: SanDisk Extreme PRO
- Rode VideoMicro Microphone
- Capture card
- Power
- External battery via micro usb works per Sony docs, not used due to broken micro-usb on a6500 used for video (details)
- Neewer dummy battery
- Power bank: Anker PowerCore 13000
Modularity Essential Kit
This is the kit that is essential for creating a setup that’s ‘more than just a camera’
- Sirui 3T Series Table Top Tripod
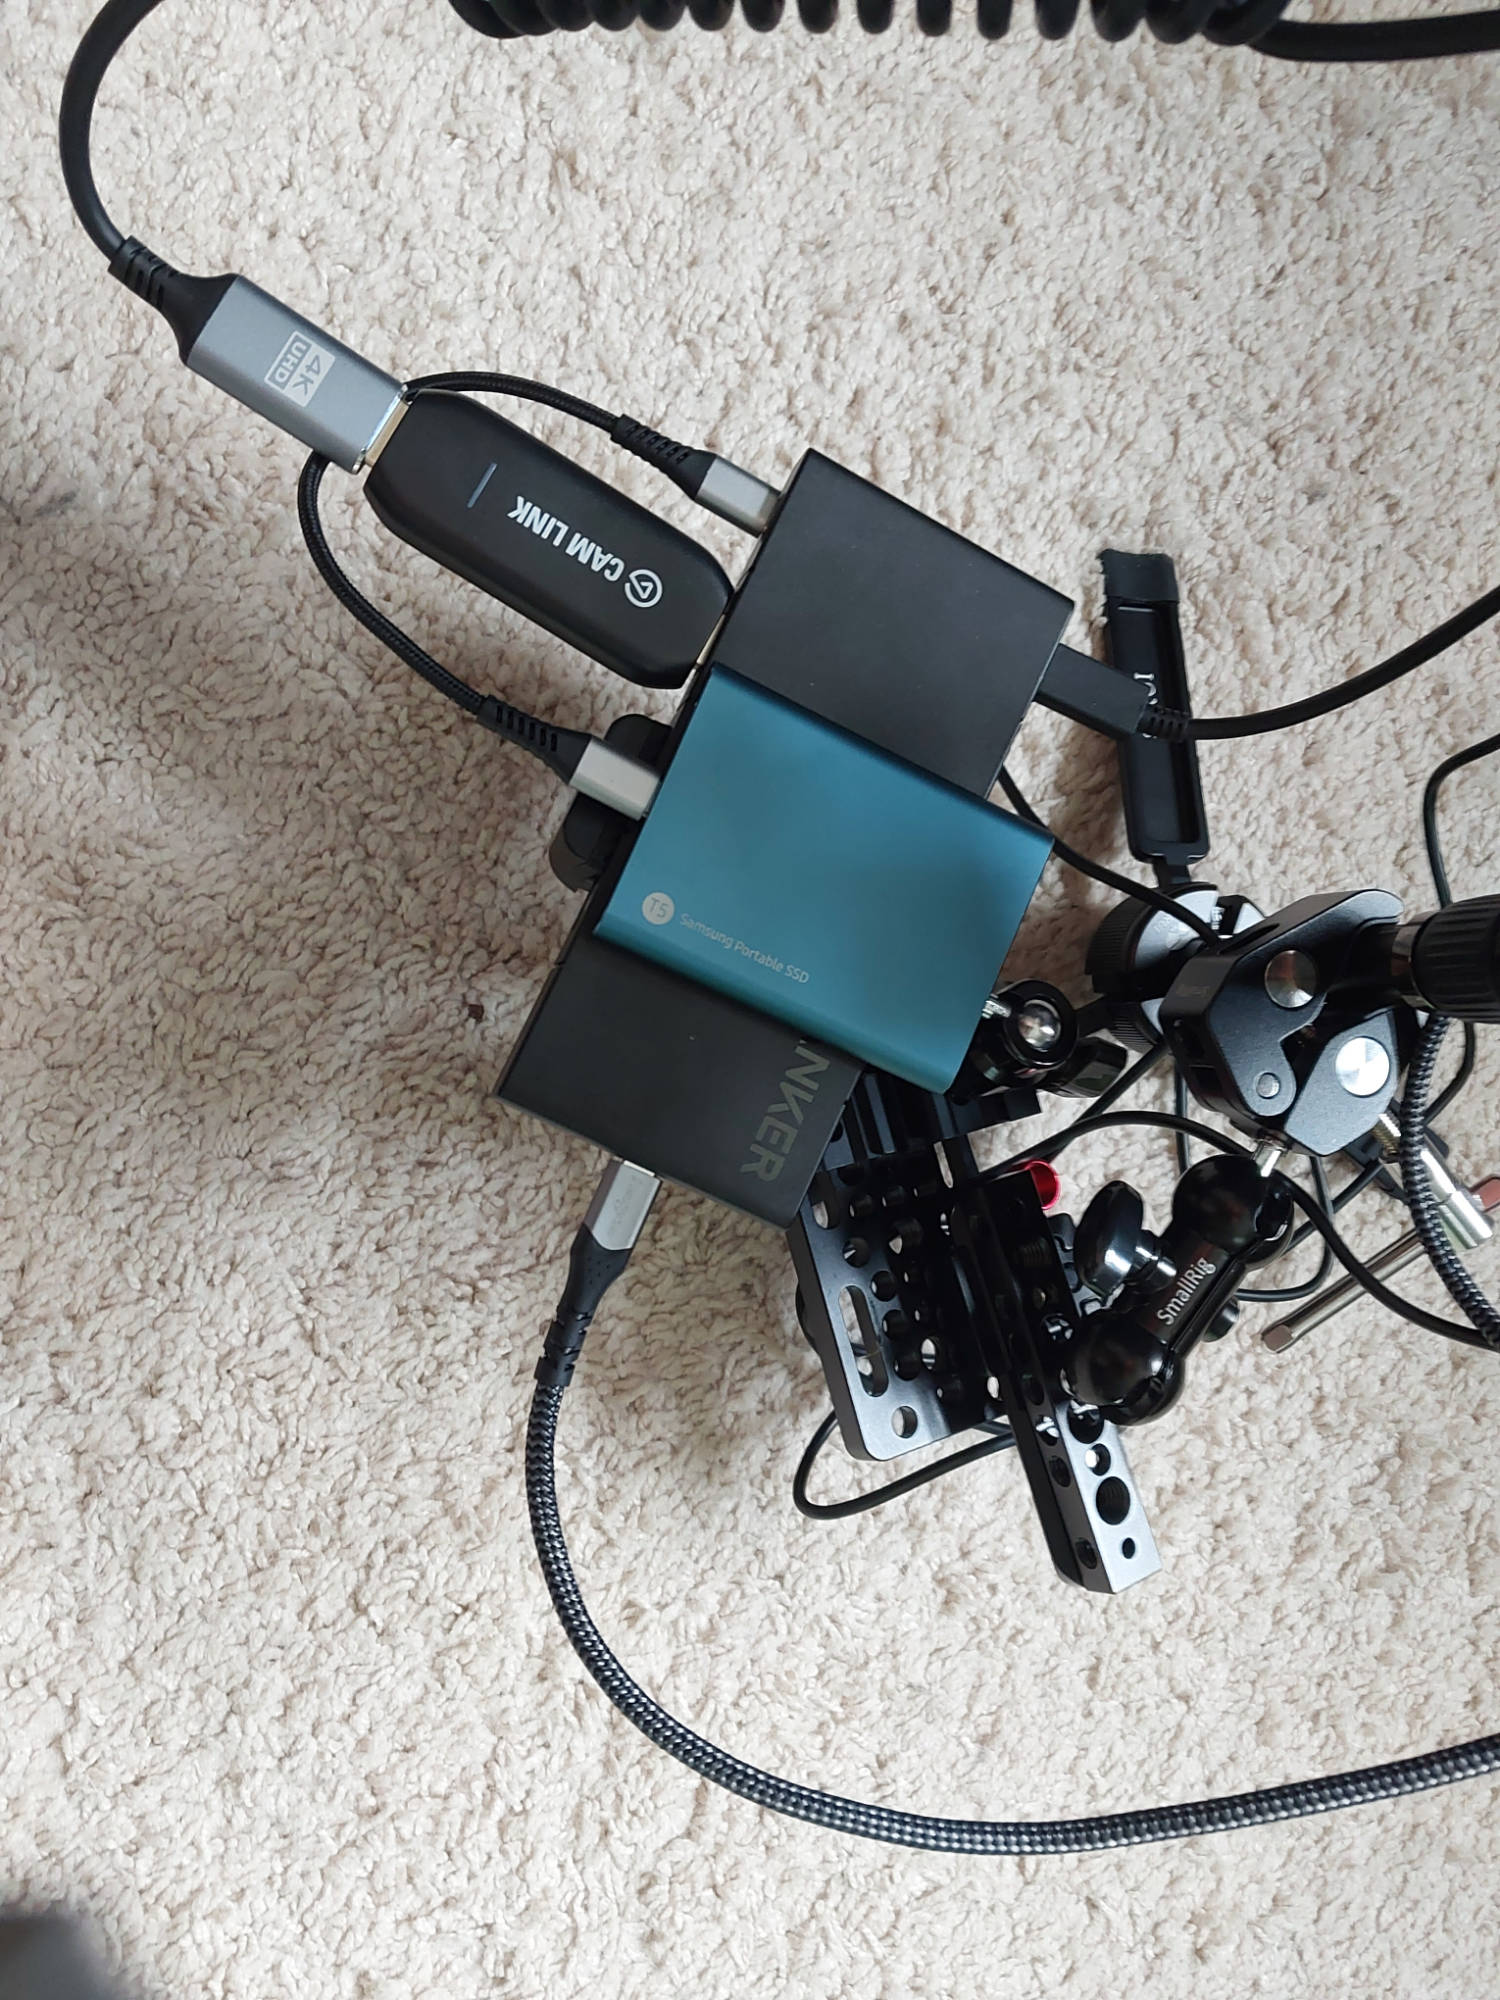
- USB Hubs
- SmallRig USB Hub SKU: 4598
- Anker 543 6-in-1 USB-C Hub
- Anker 364 10-in-1 USB-C Hub
- External disk: Samsung T5 USB-C SSD
- SmallRig Sony a6500 Half Cage (or equivalent)
- SmallRig Microphone Holder
Modular Attachment Kit
This is the core kit I used to attach ‘all the things’ to the camera and tripod for ‘forever recording’ without needing a PC ‘at hand’
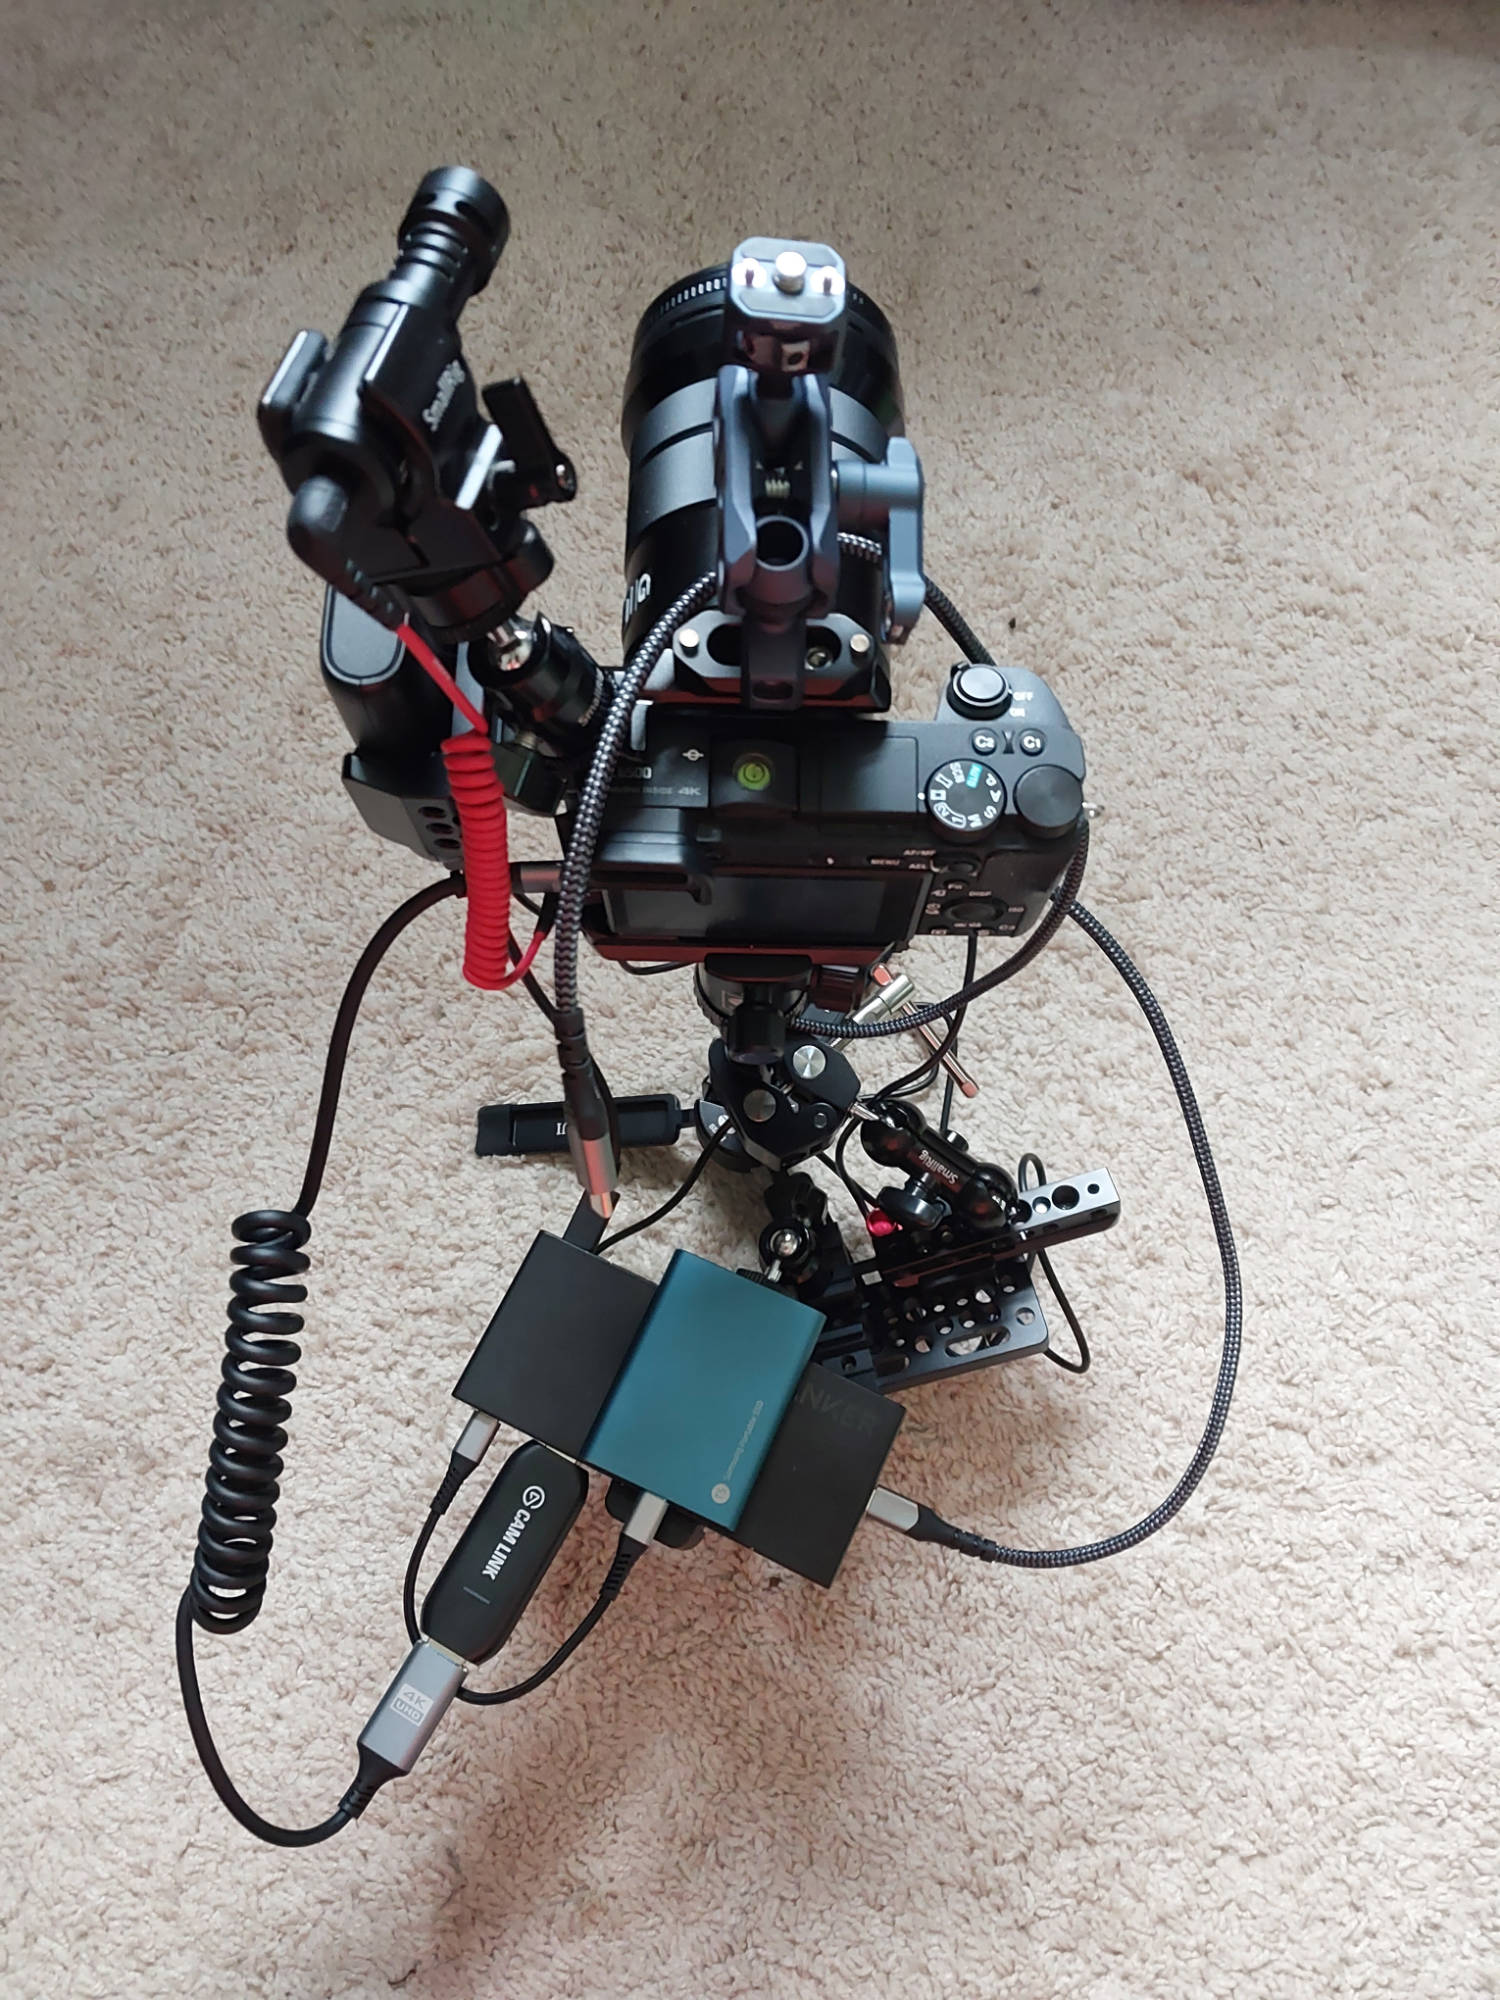
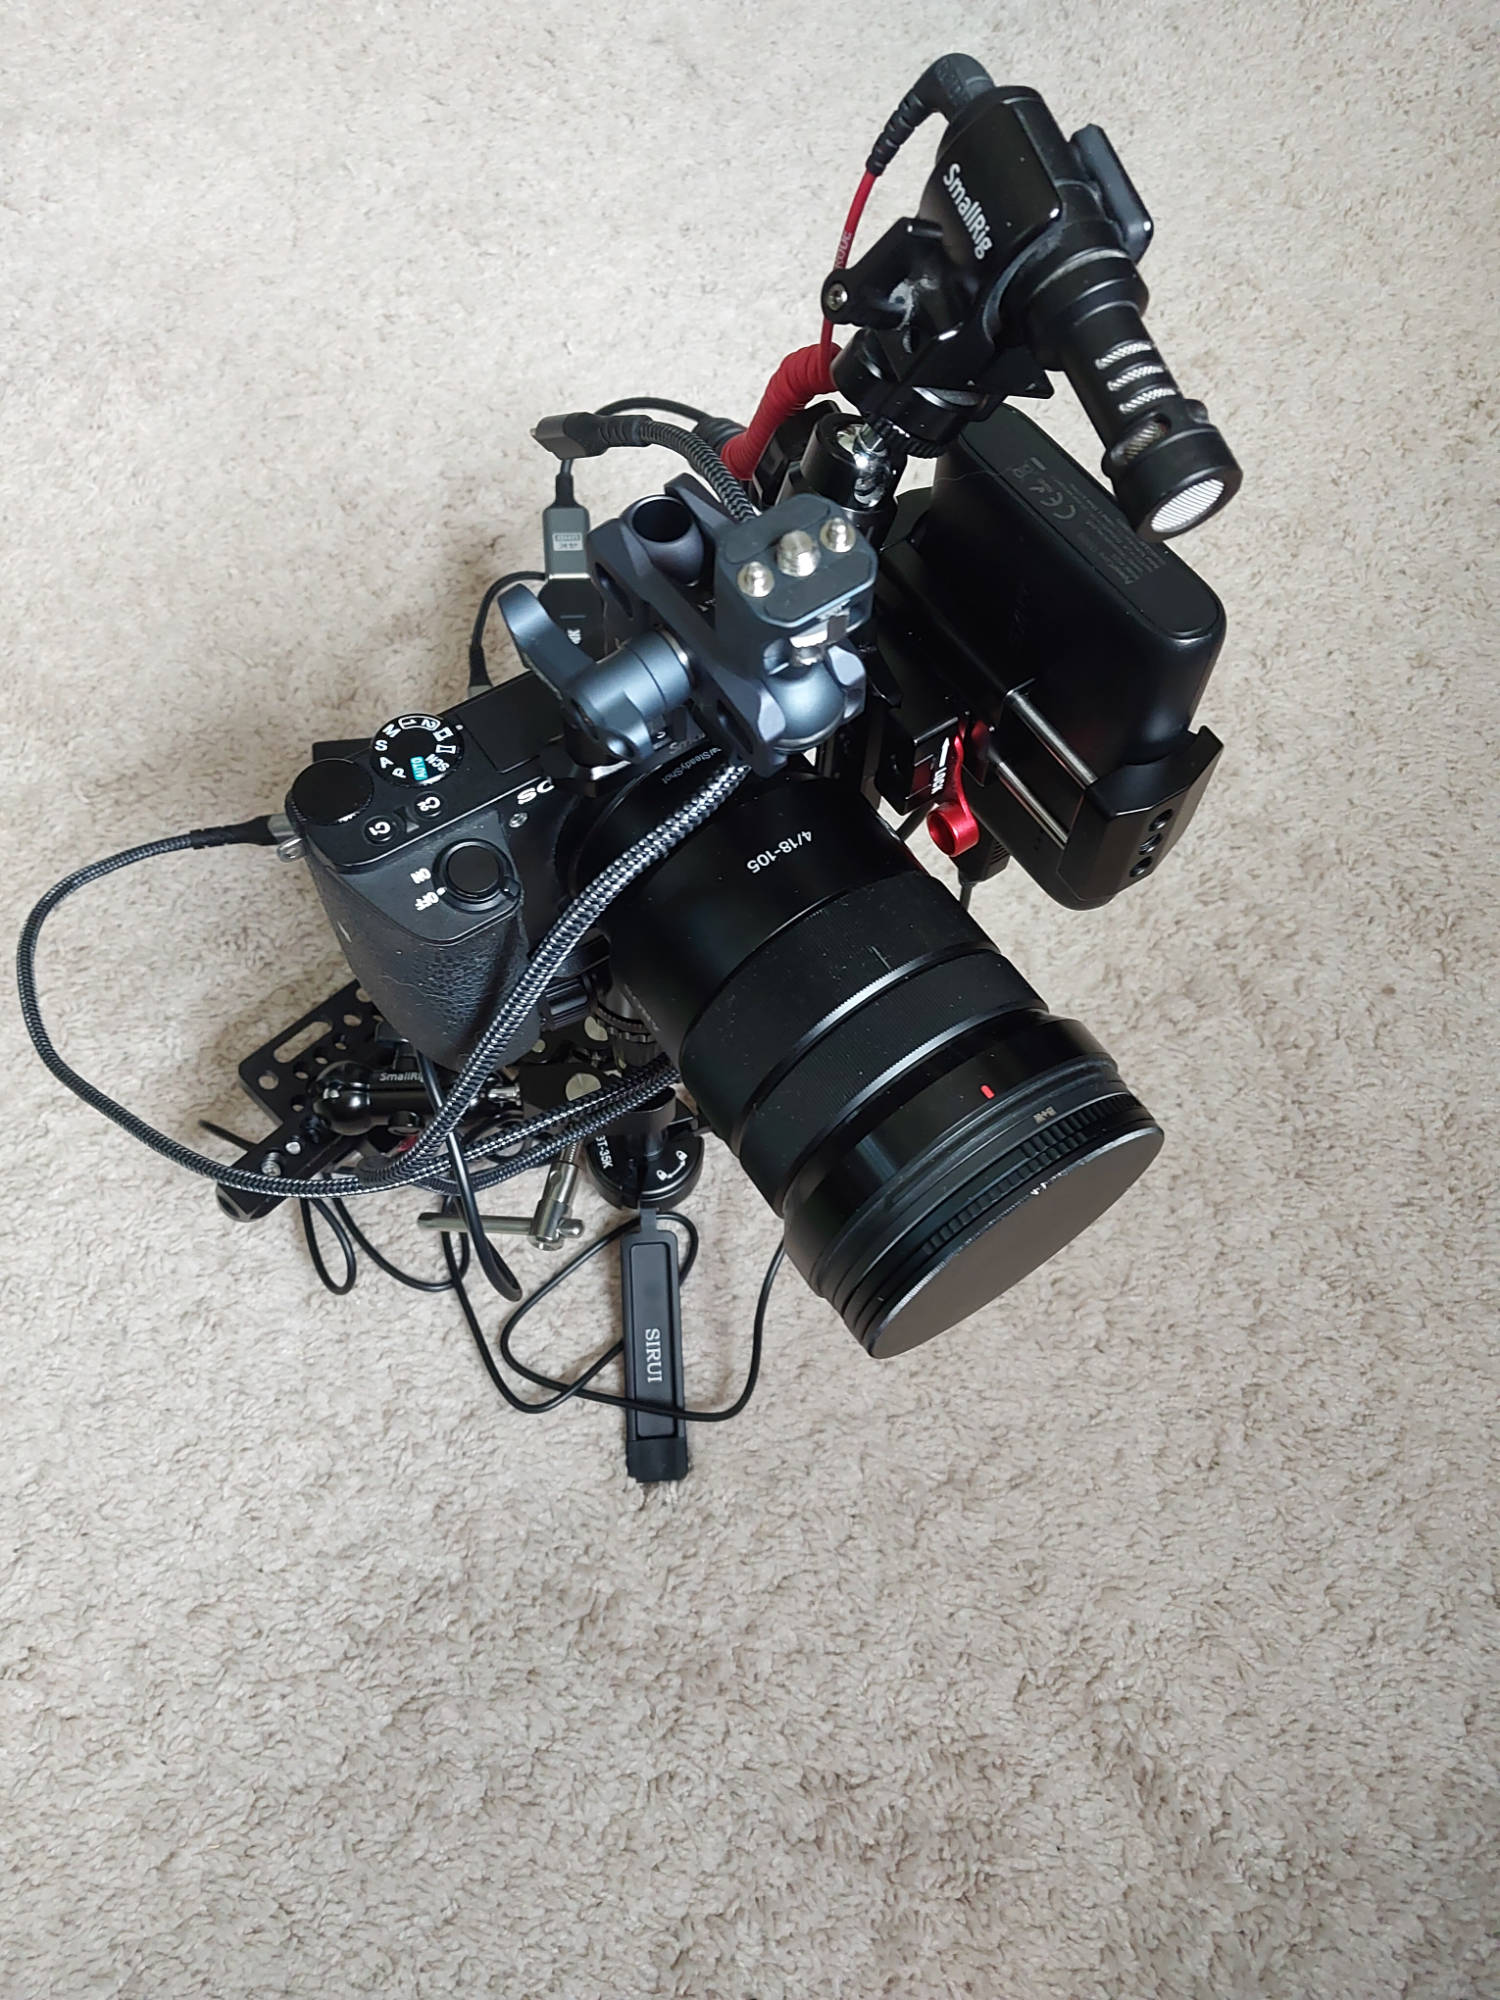
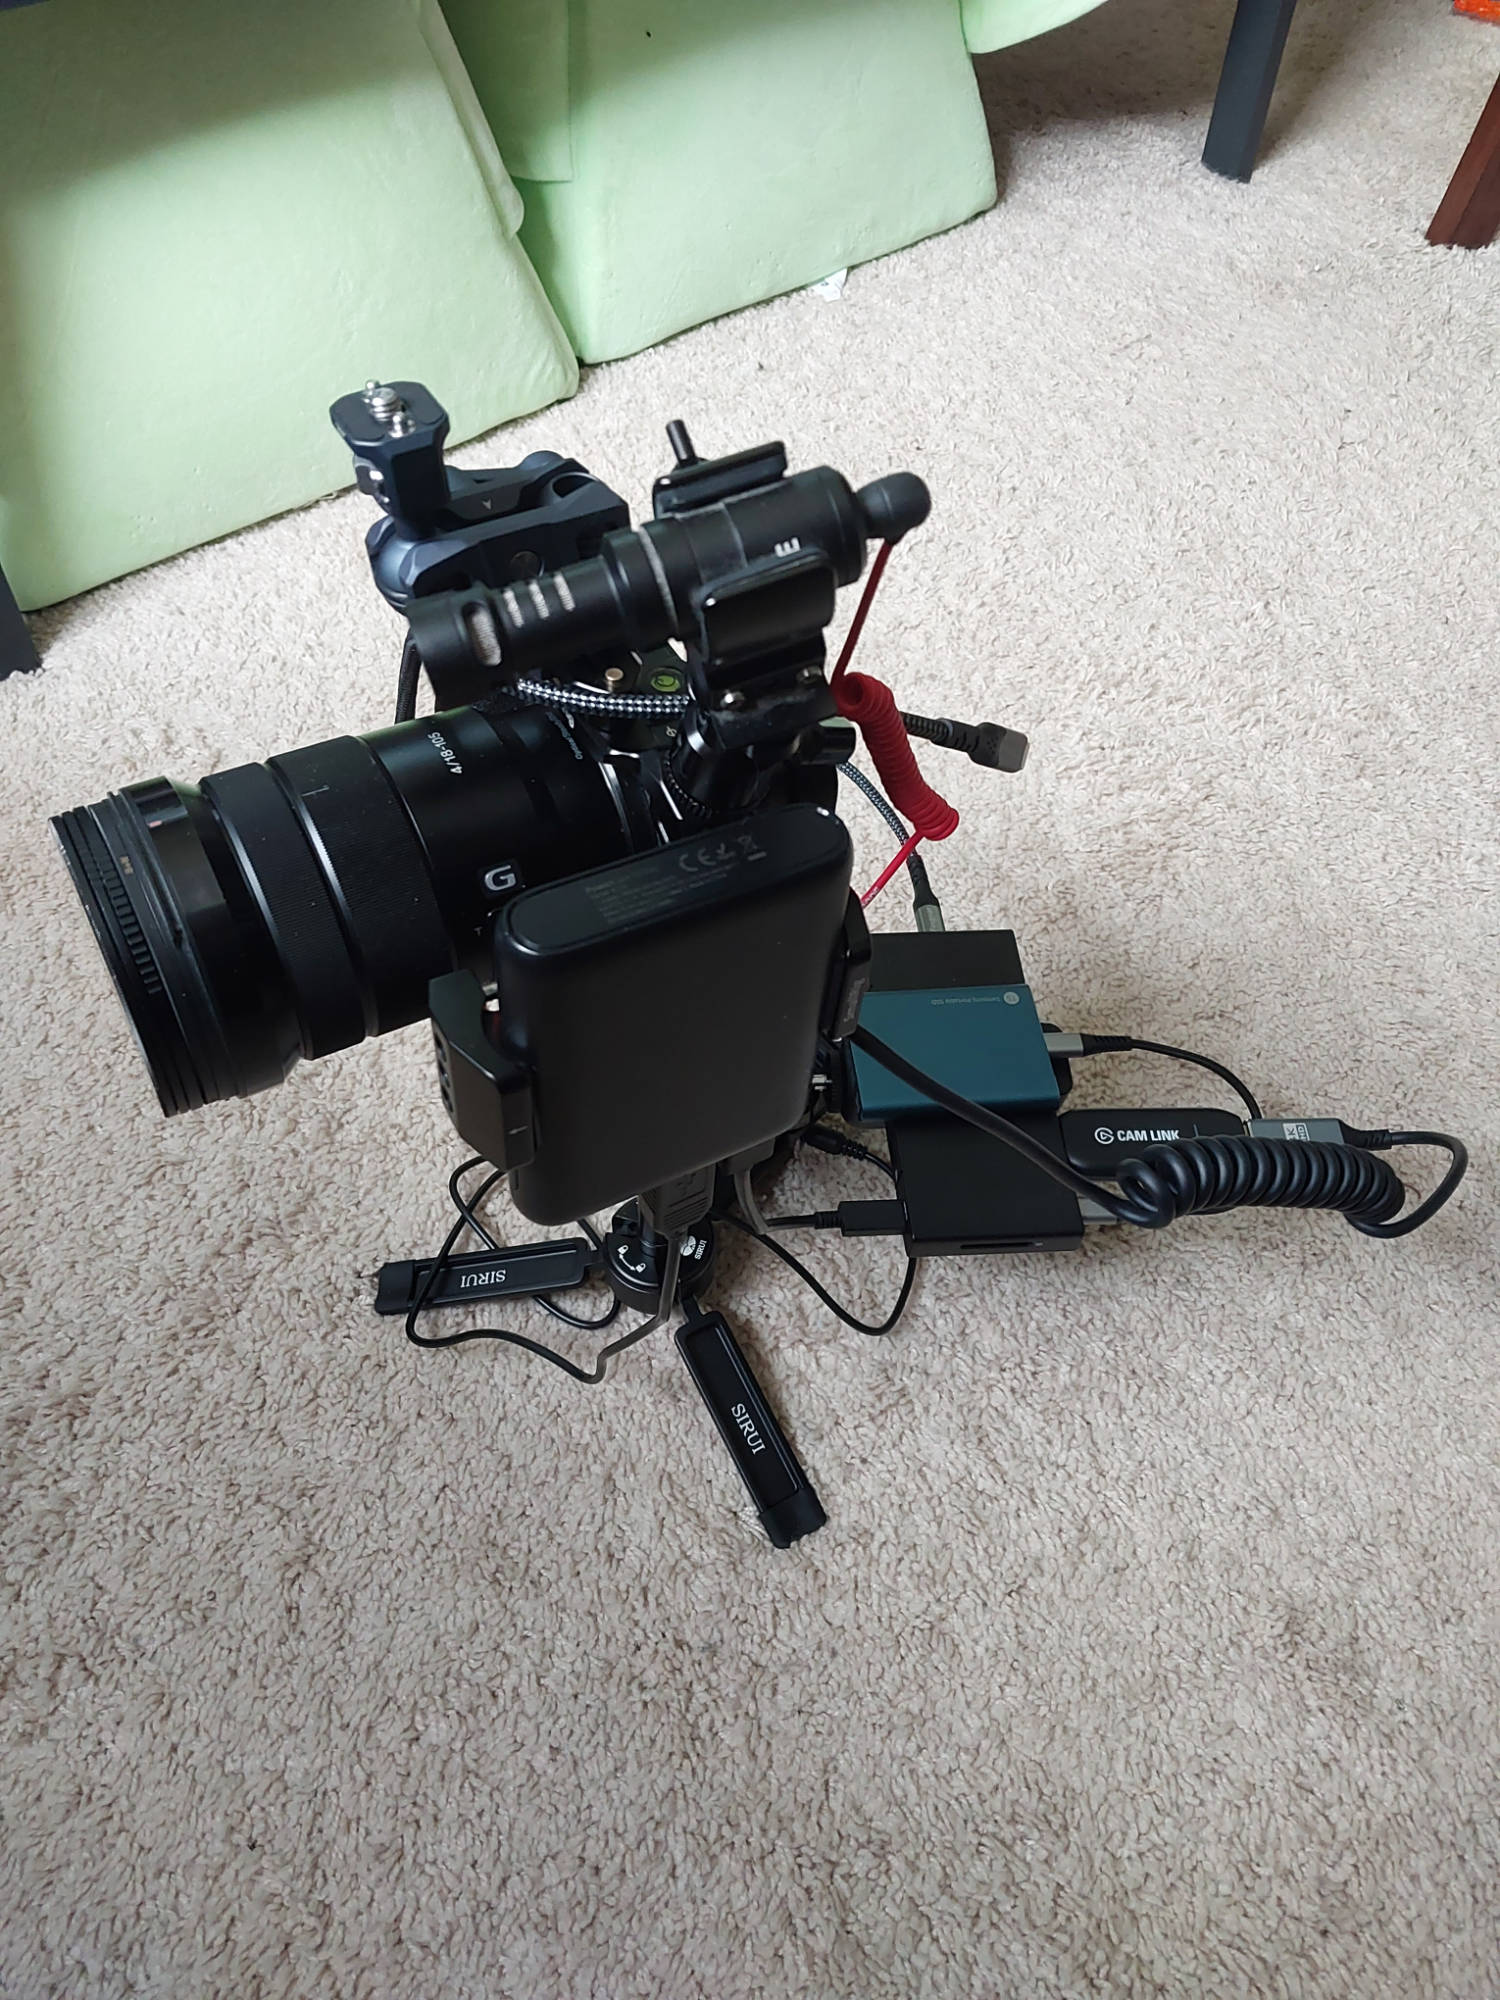
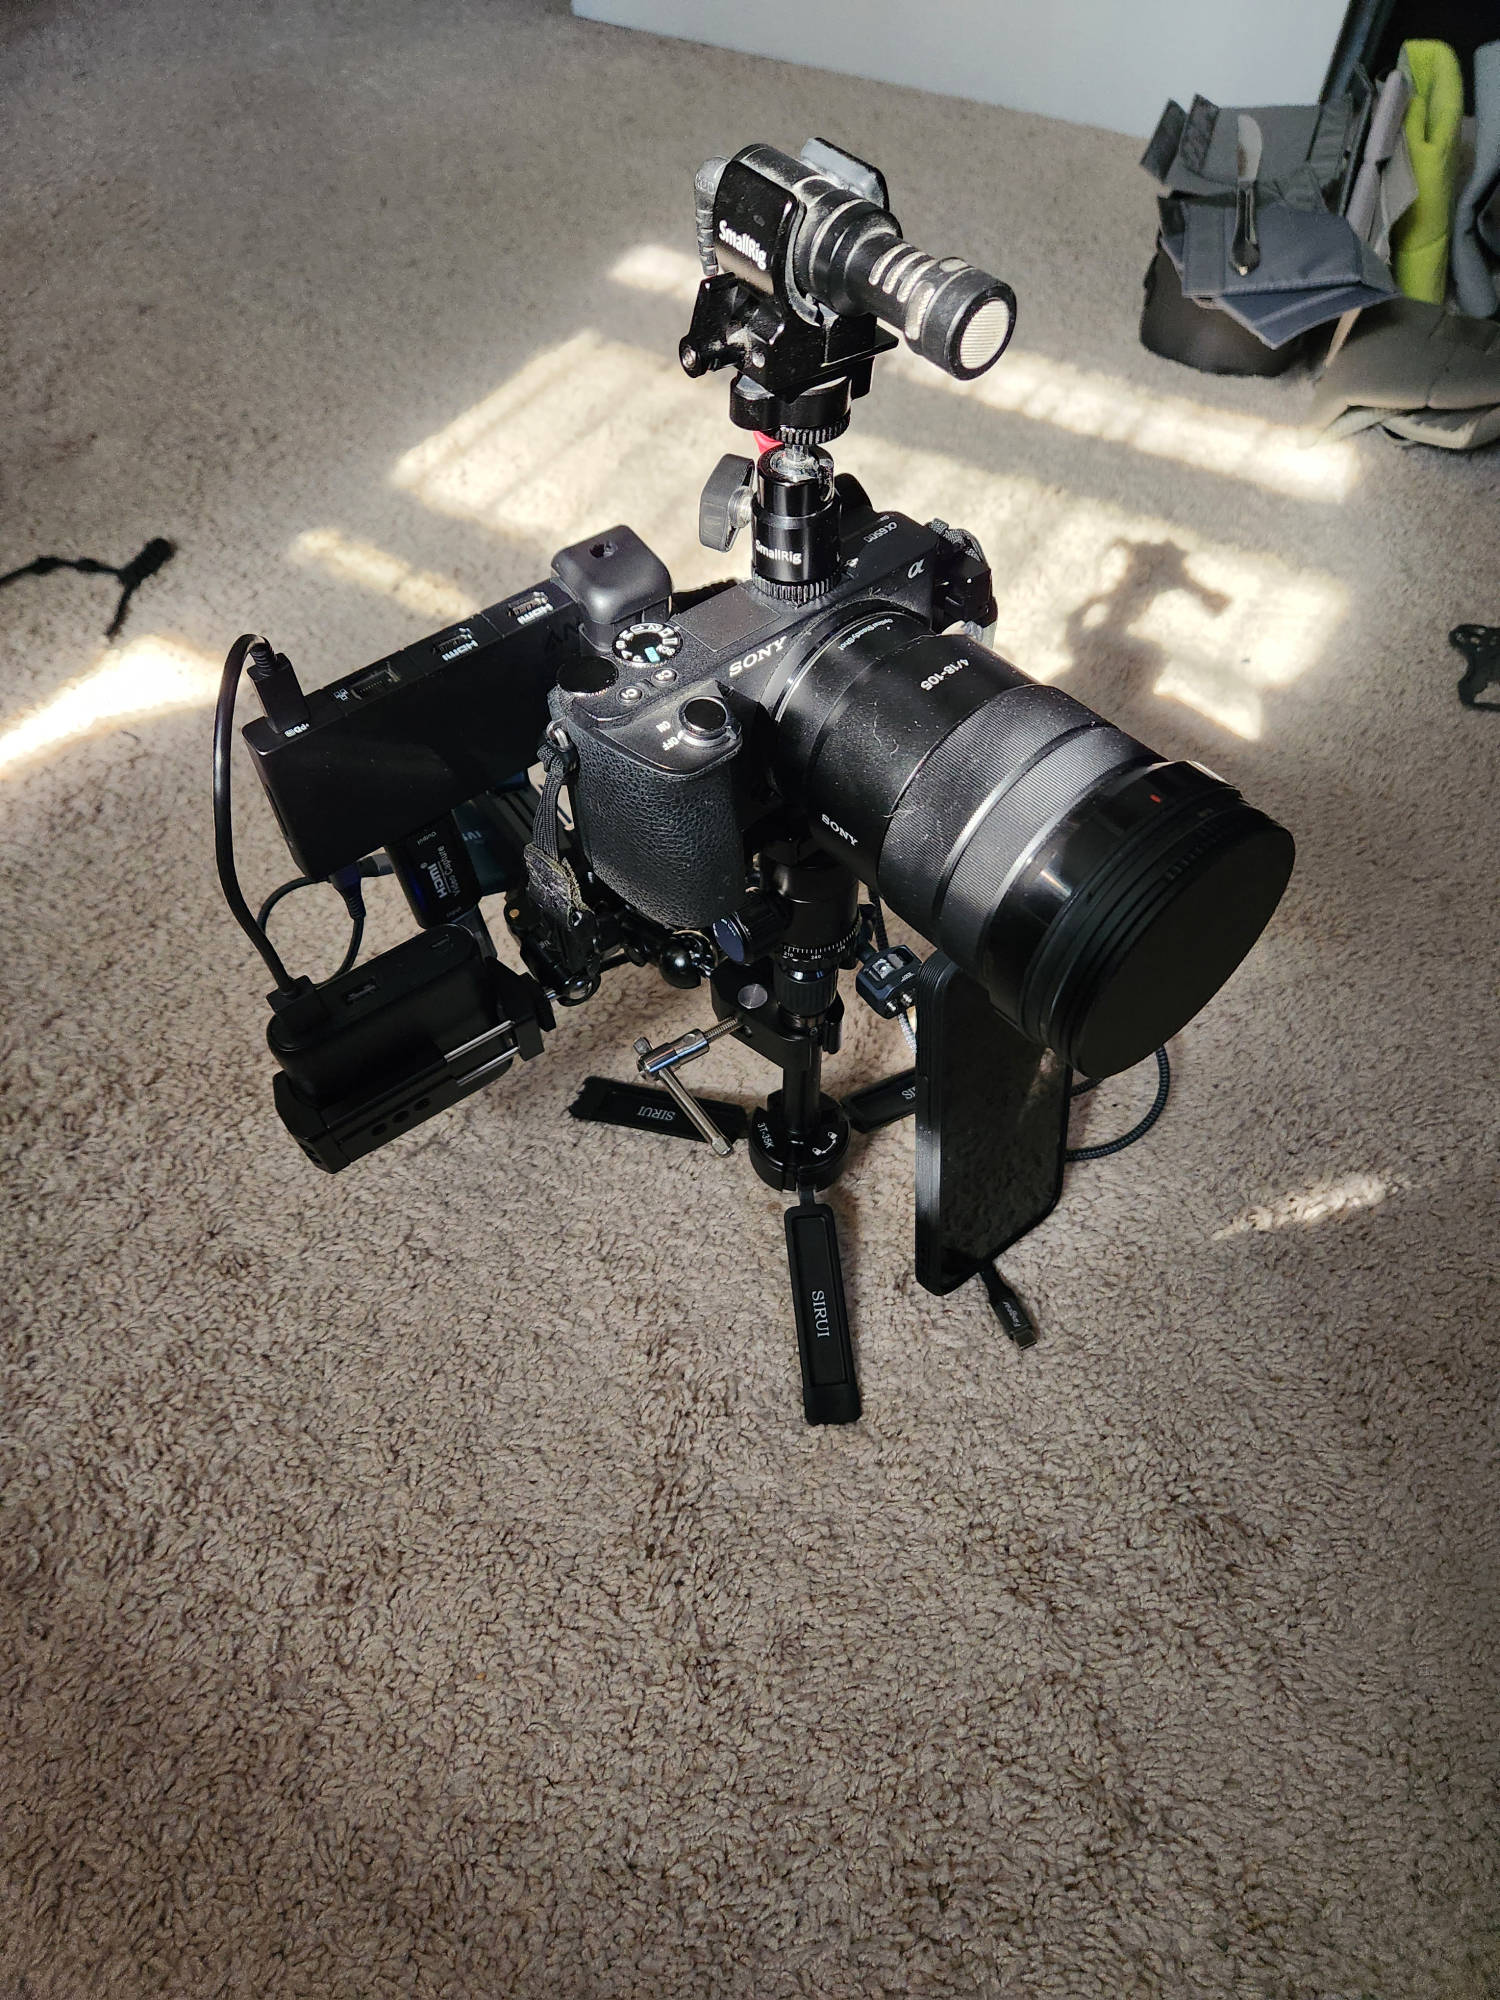
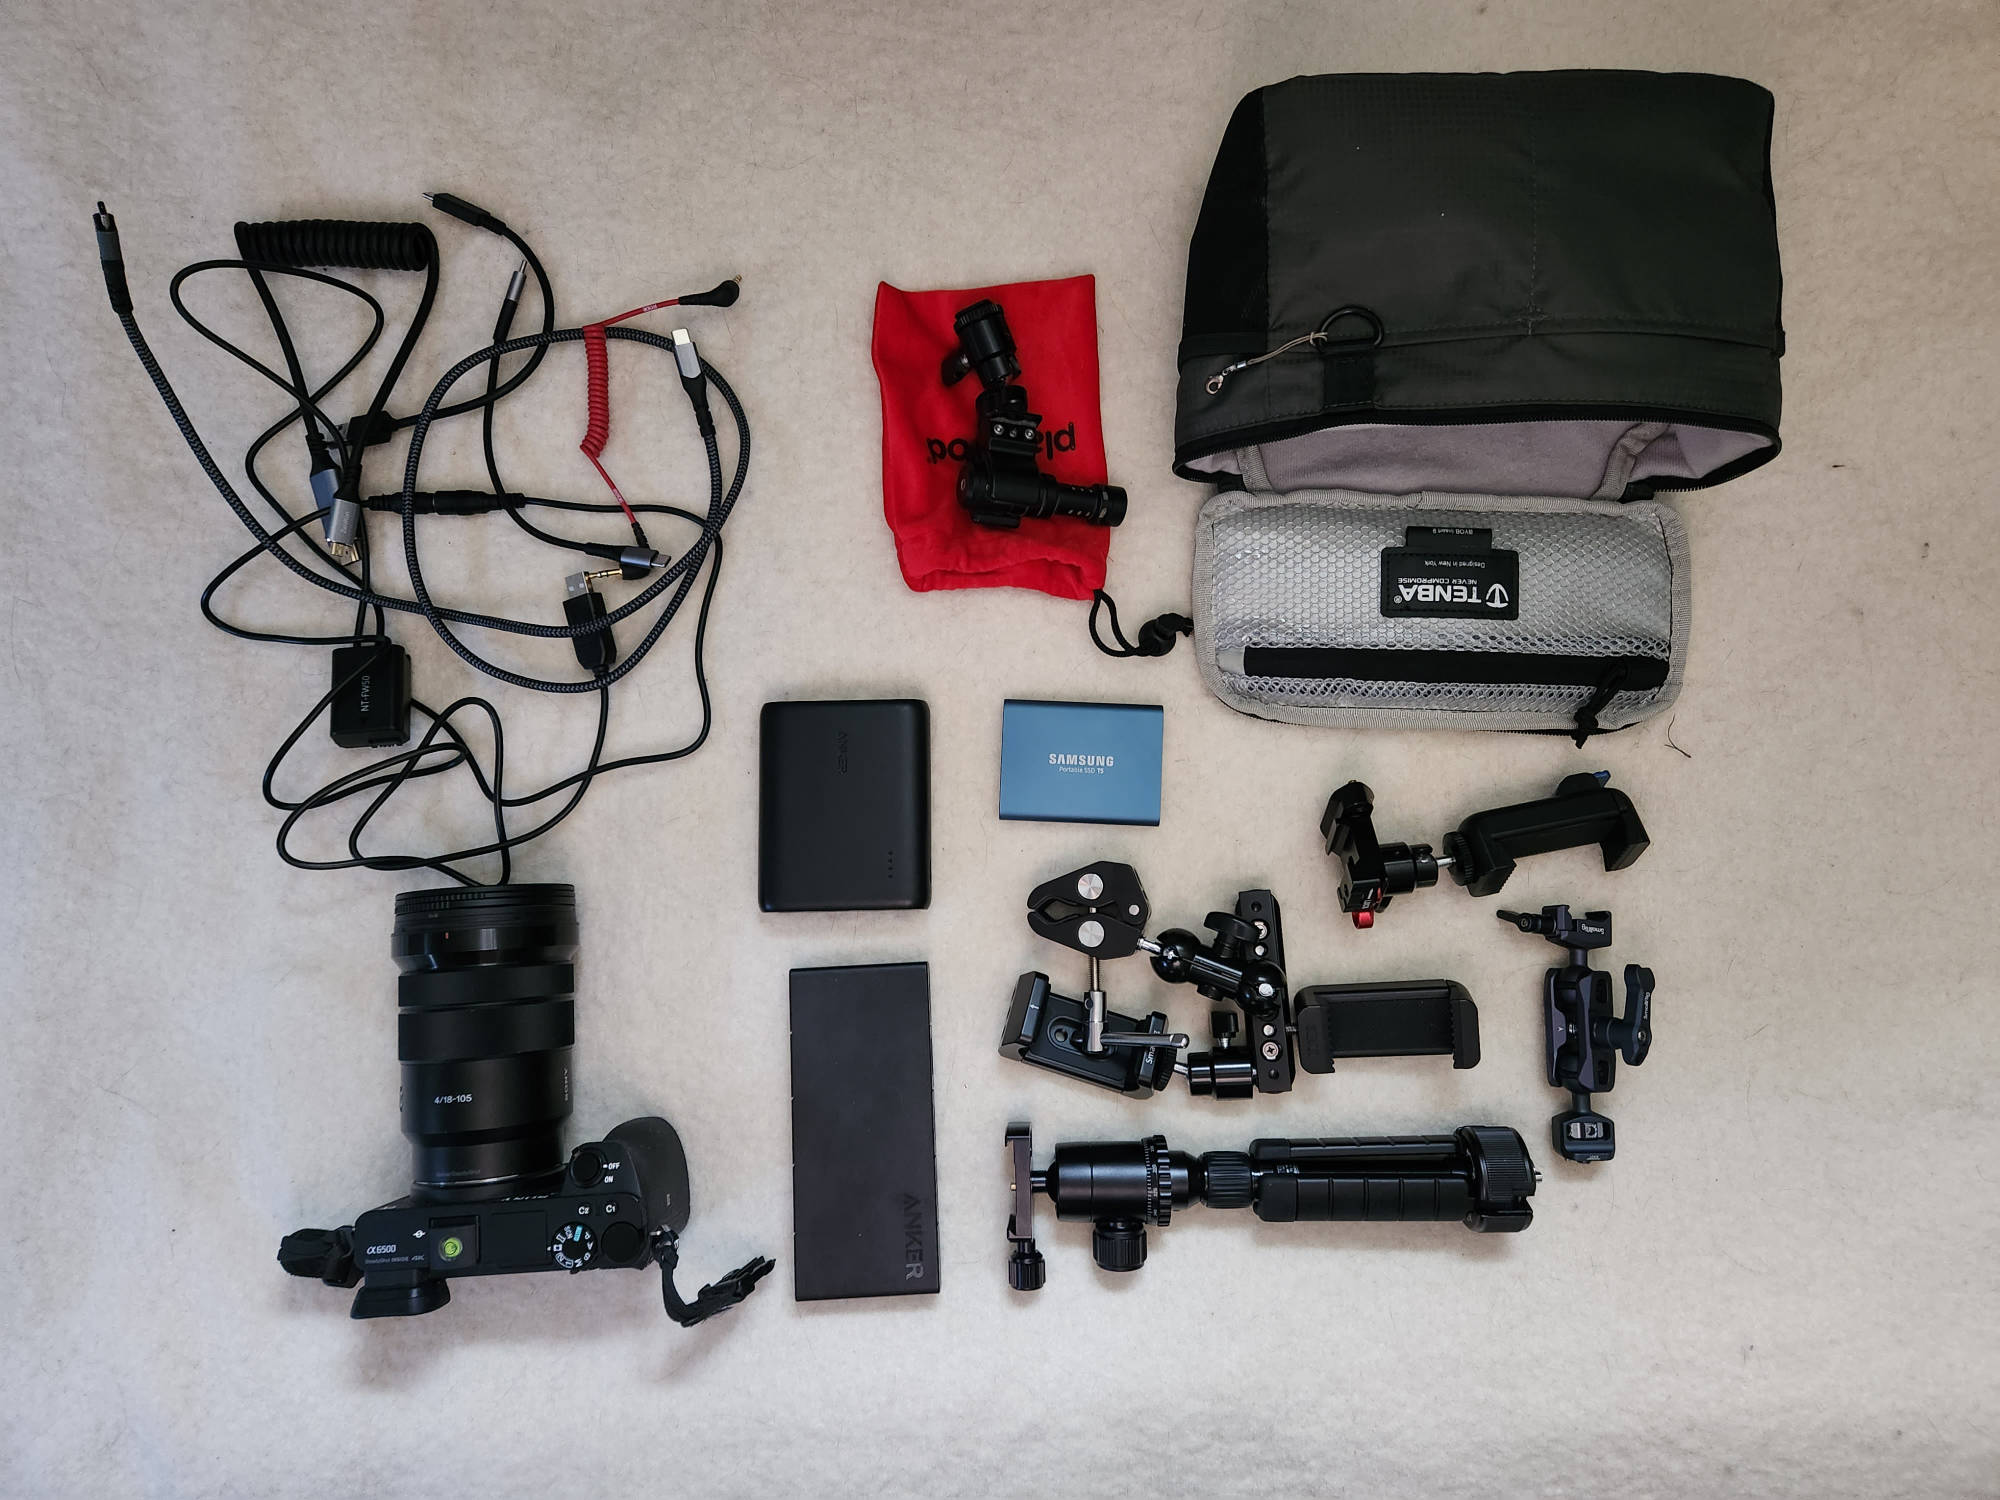
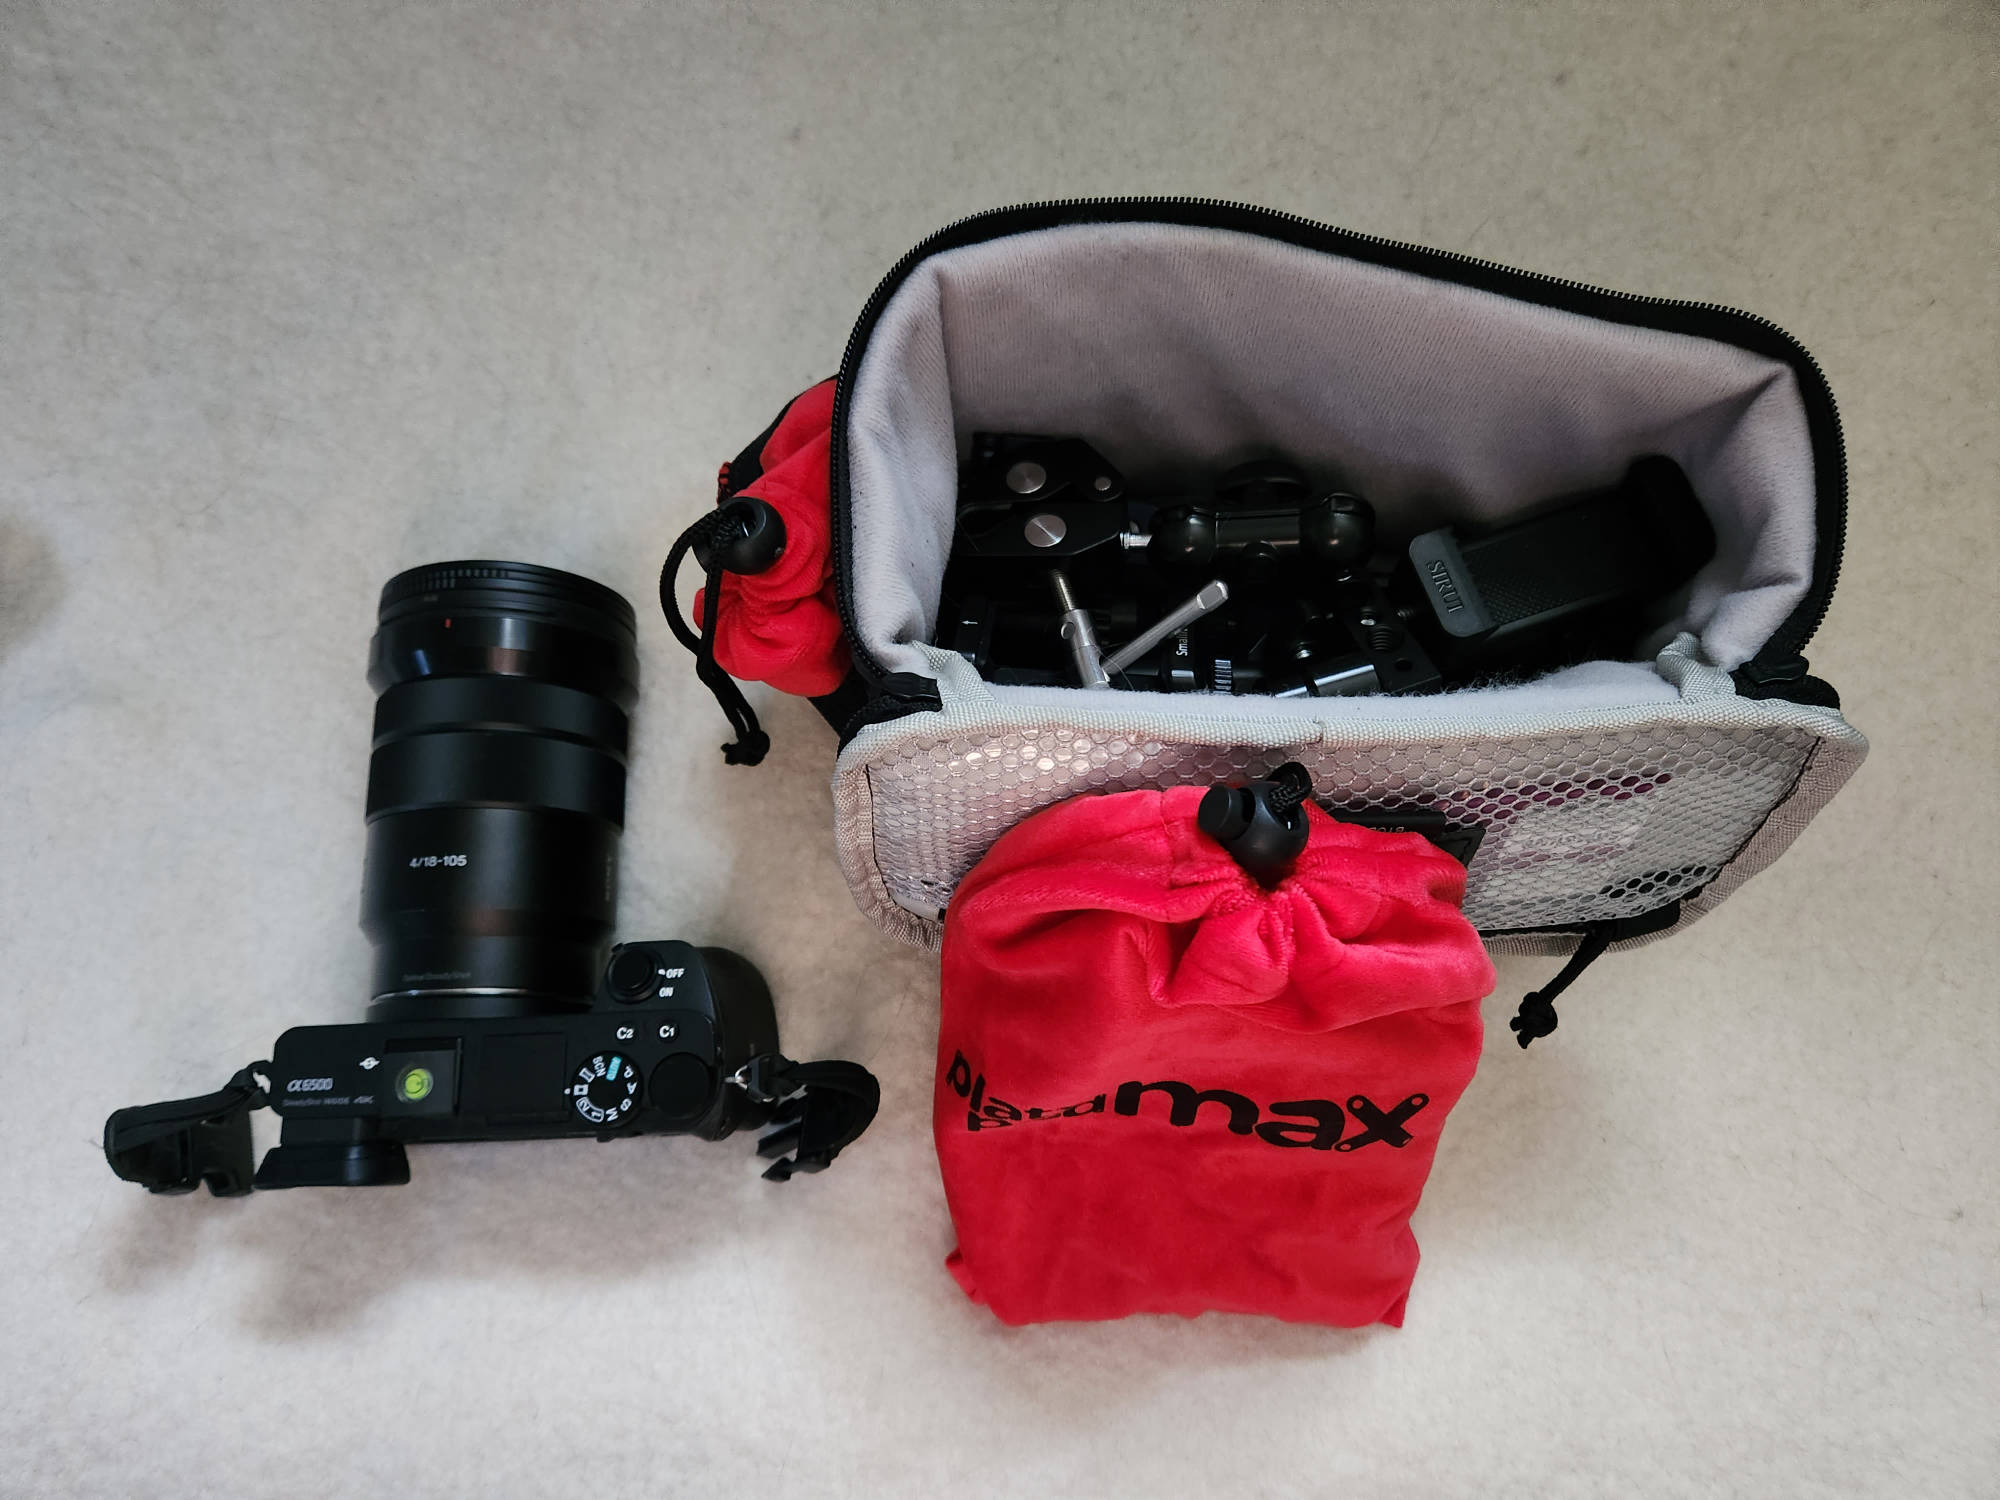
Items like ‘NATO Rails’, mini cold shoe ball heads and similar were left off the list. Attaching everything as one unit requires playing Tetris. See gallery images for ideas on how to tie everything together.
- SmallRig Crab Clamp with Ballhead Magic Arm
- SmallRig Hot Shoe Ball-Head
- SmallRig Magic Arm
- SmallRig Holder For Portable Power Banks
- Sirui Mobile Phone Clamp
Imaging Edge
Allows remote control of Sony a6500 via phone. There are a ton of quirks, see below for details.
Critical things to note
- Must disable mobile data
- Must disable vpn (Tailscale & others)
- Leaving the phone app resets the connection
- Locking the phone resets the connection
- Need to restart camera to get re-connects working
Things to note
- Imaging Edge seems to keep the phone screen always on
- Imaging Edge eats phone and camera power
- Video recording seems to stay active when leaving the app on phone
Use
- Prep
- Run smart remote control under application list on camera
- Initial connect via…
- NFC tap
- QR code
- Re-connect via…
- Use
Startbutton for exising camera - QR code scan
- NFC tap
- Use
a6500 Details
Misc Specs
- Battery life for recording:
less than one hour - Max single video length:
30 mins
Camera available storage
Per UI and freshly formatted SD card
| Card Size | Video Duration | Still Images |
|---|---|---|
| 32gb | 1h 6m | 916 |
| 64gb | 2h 13m | 1832 |
| 128gb | 4h 27m | 3663 |
Recorded Video Information
- Codec: h264 -
avc1 - Resolution:
3840x2160 - Frame rate:
29.97 - Audio codec:
twos - Kdenlive preset to use:
4K UHD 2160p 29.97
Settings
- Adapted from
- Movie1
- Movie / S&Q Motion:
Program Auto - File Format:
XAVC S 4K - Record Setting:
30p 60M - S&Q Settings
- Record Setting:
30p - Frame Rate:
120fps
- Record Setting:
- Dual Video REC:
Off - AF drive speed:
normal
- Movie / S&Q Motion:
- Movie2
- AF Track Sens:
Standard - Auto Slow Shut.:
On - Audio Recording:
On - Audio Rec Level:
26 (Likely needs tuning) - Audio Level Display:
On - Wind Noise Reduct.:
On
- AF Track Sens:
- Movie3
- Marker Display:
Tunable via Fn Menu - Marker Settings
- Center:
On - Aspect:
Off - Safety Zone:
Off - Guideframe:
Off
- Center:
- Marker Display:
- Custom Operation1
- MOVIE Button:
Always - Custom Key (Shoot.)
- Custom Button 1:
Application List - Custom Button 2:
MOVIE - AF/MF Button:
Focus Mode
- Custom Button 1:
- Function Menu Set.
- Function Upper1:
SteadyShot - Function Upper2:
Audio Rec Level - Function Upper3:
Metering Mode - Function Upper4:
Center Lock-on AF - Function Upper5:
Peaking Level - Function Upper6:
Shoot Mode - Function Lower1:
Smile / Face Detect. - Function Lower2:
Audio Level Display - Function Lower3:
Focus Area - Function Lower4:
Zebra - Function Lower5:
Grid Line - Function Lower6:
Marker Display
- Function Upper1:
- MOVIE Button:
- Custom Operation2
- Audio signals:
On
- Audio signals:
- Setup2
- Auto Pwr OFF Temp.: High
- Setup5
- PC Remote Settings
- Still Img. Save Dest.:
PC+Camera - RAW+J PC Save Img:
RAW & JPEG
- Still Img. Save Dest.:
- PC Remote Settings
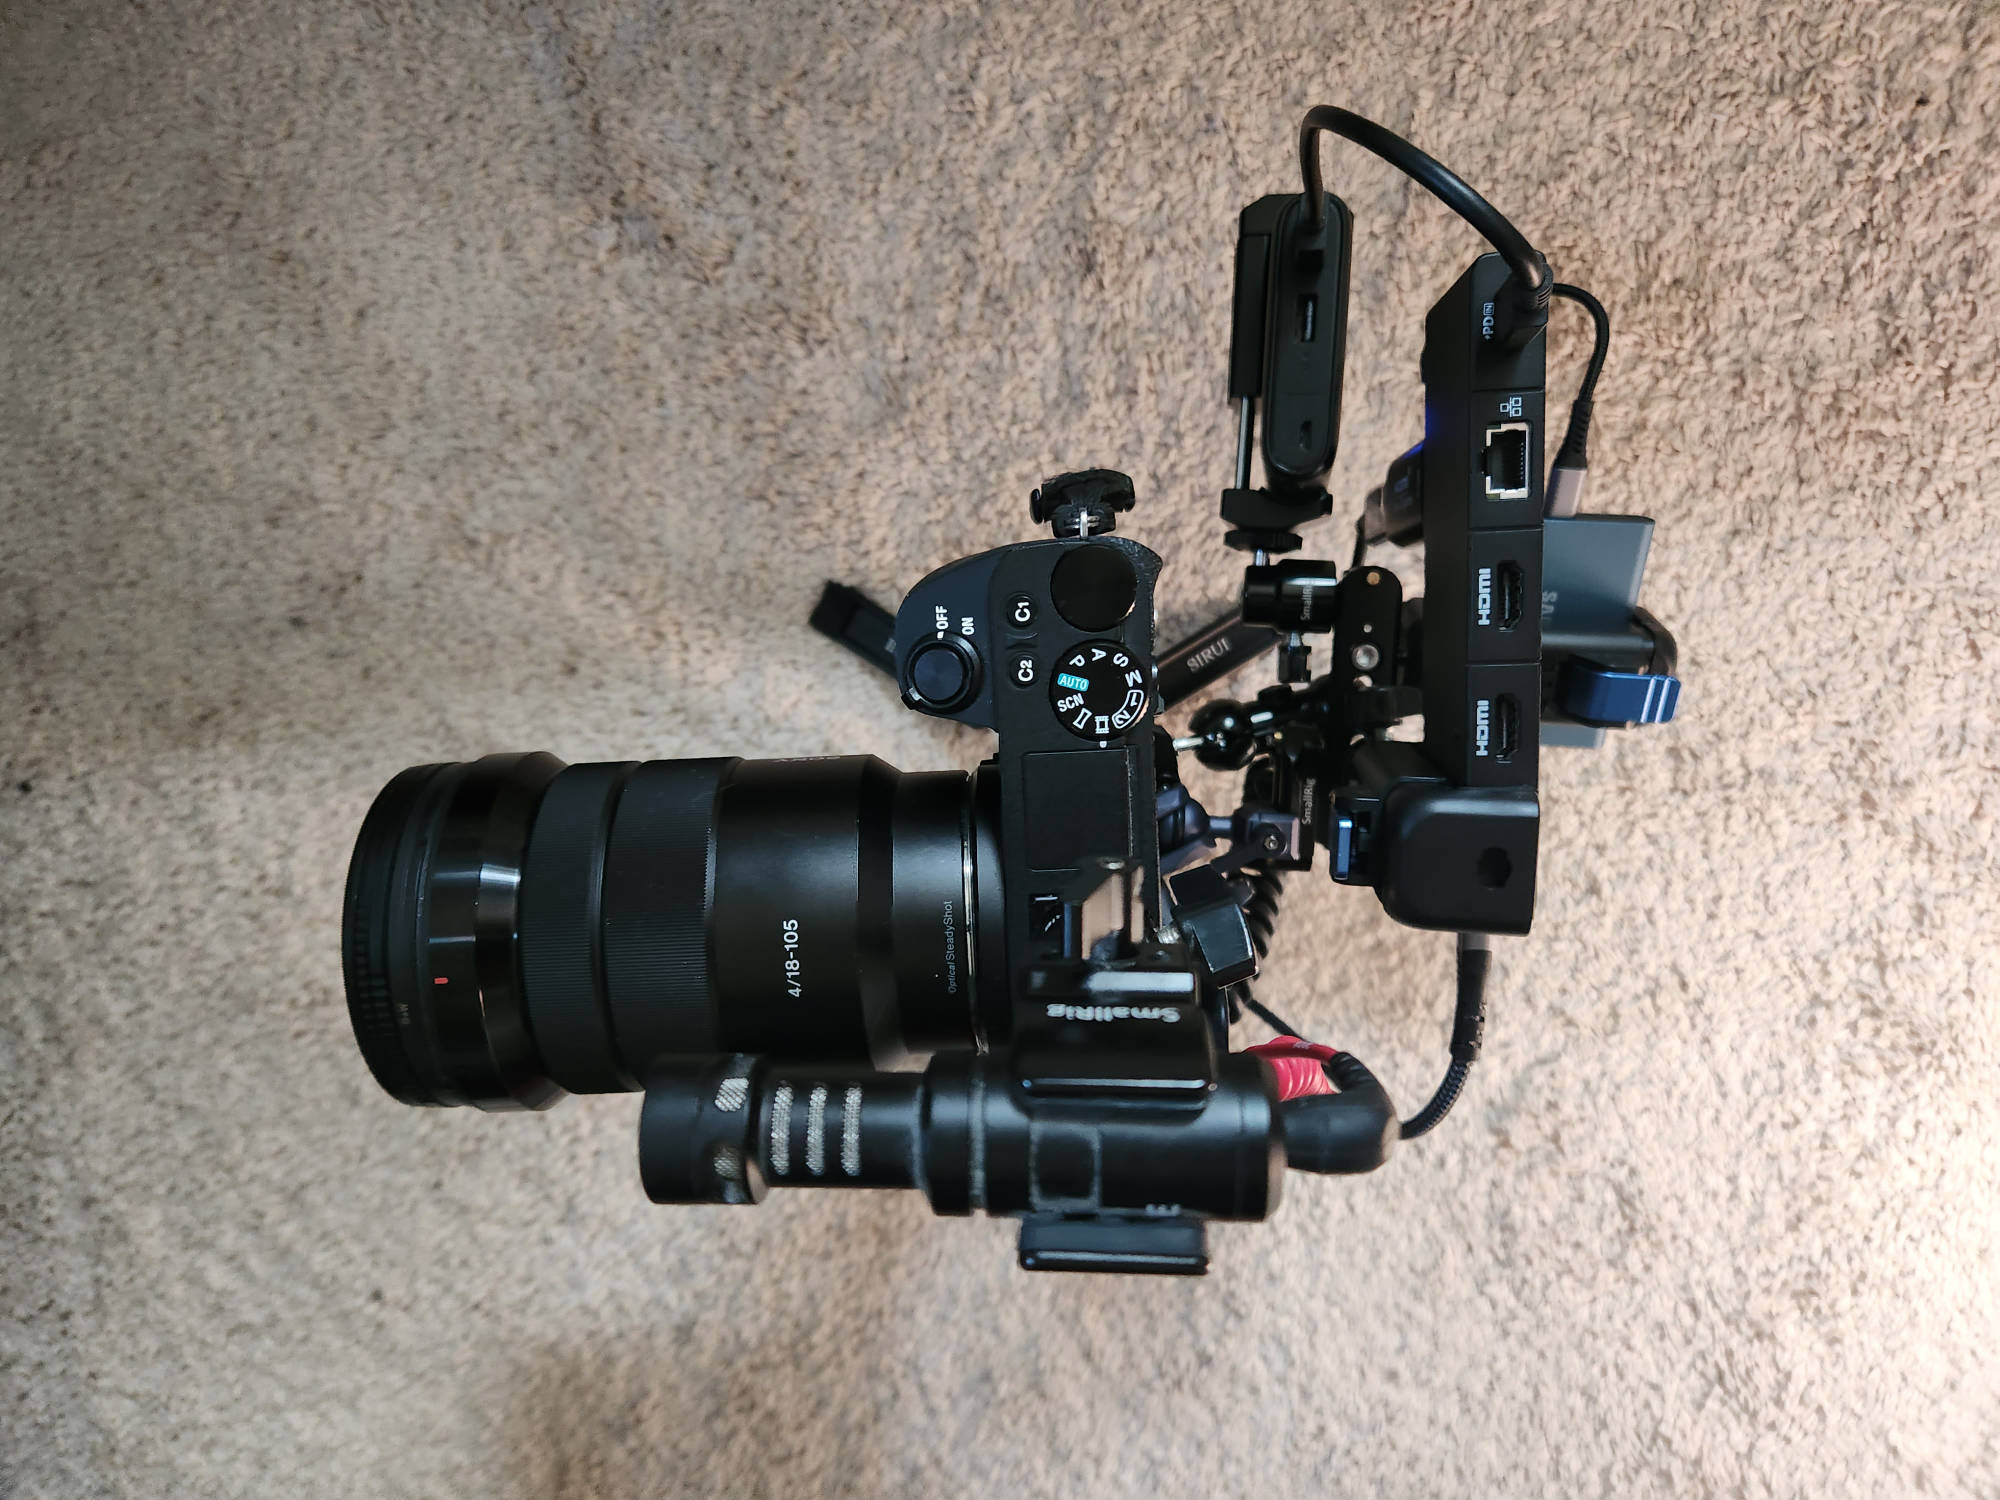
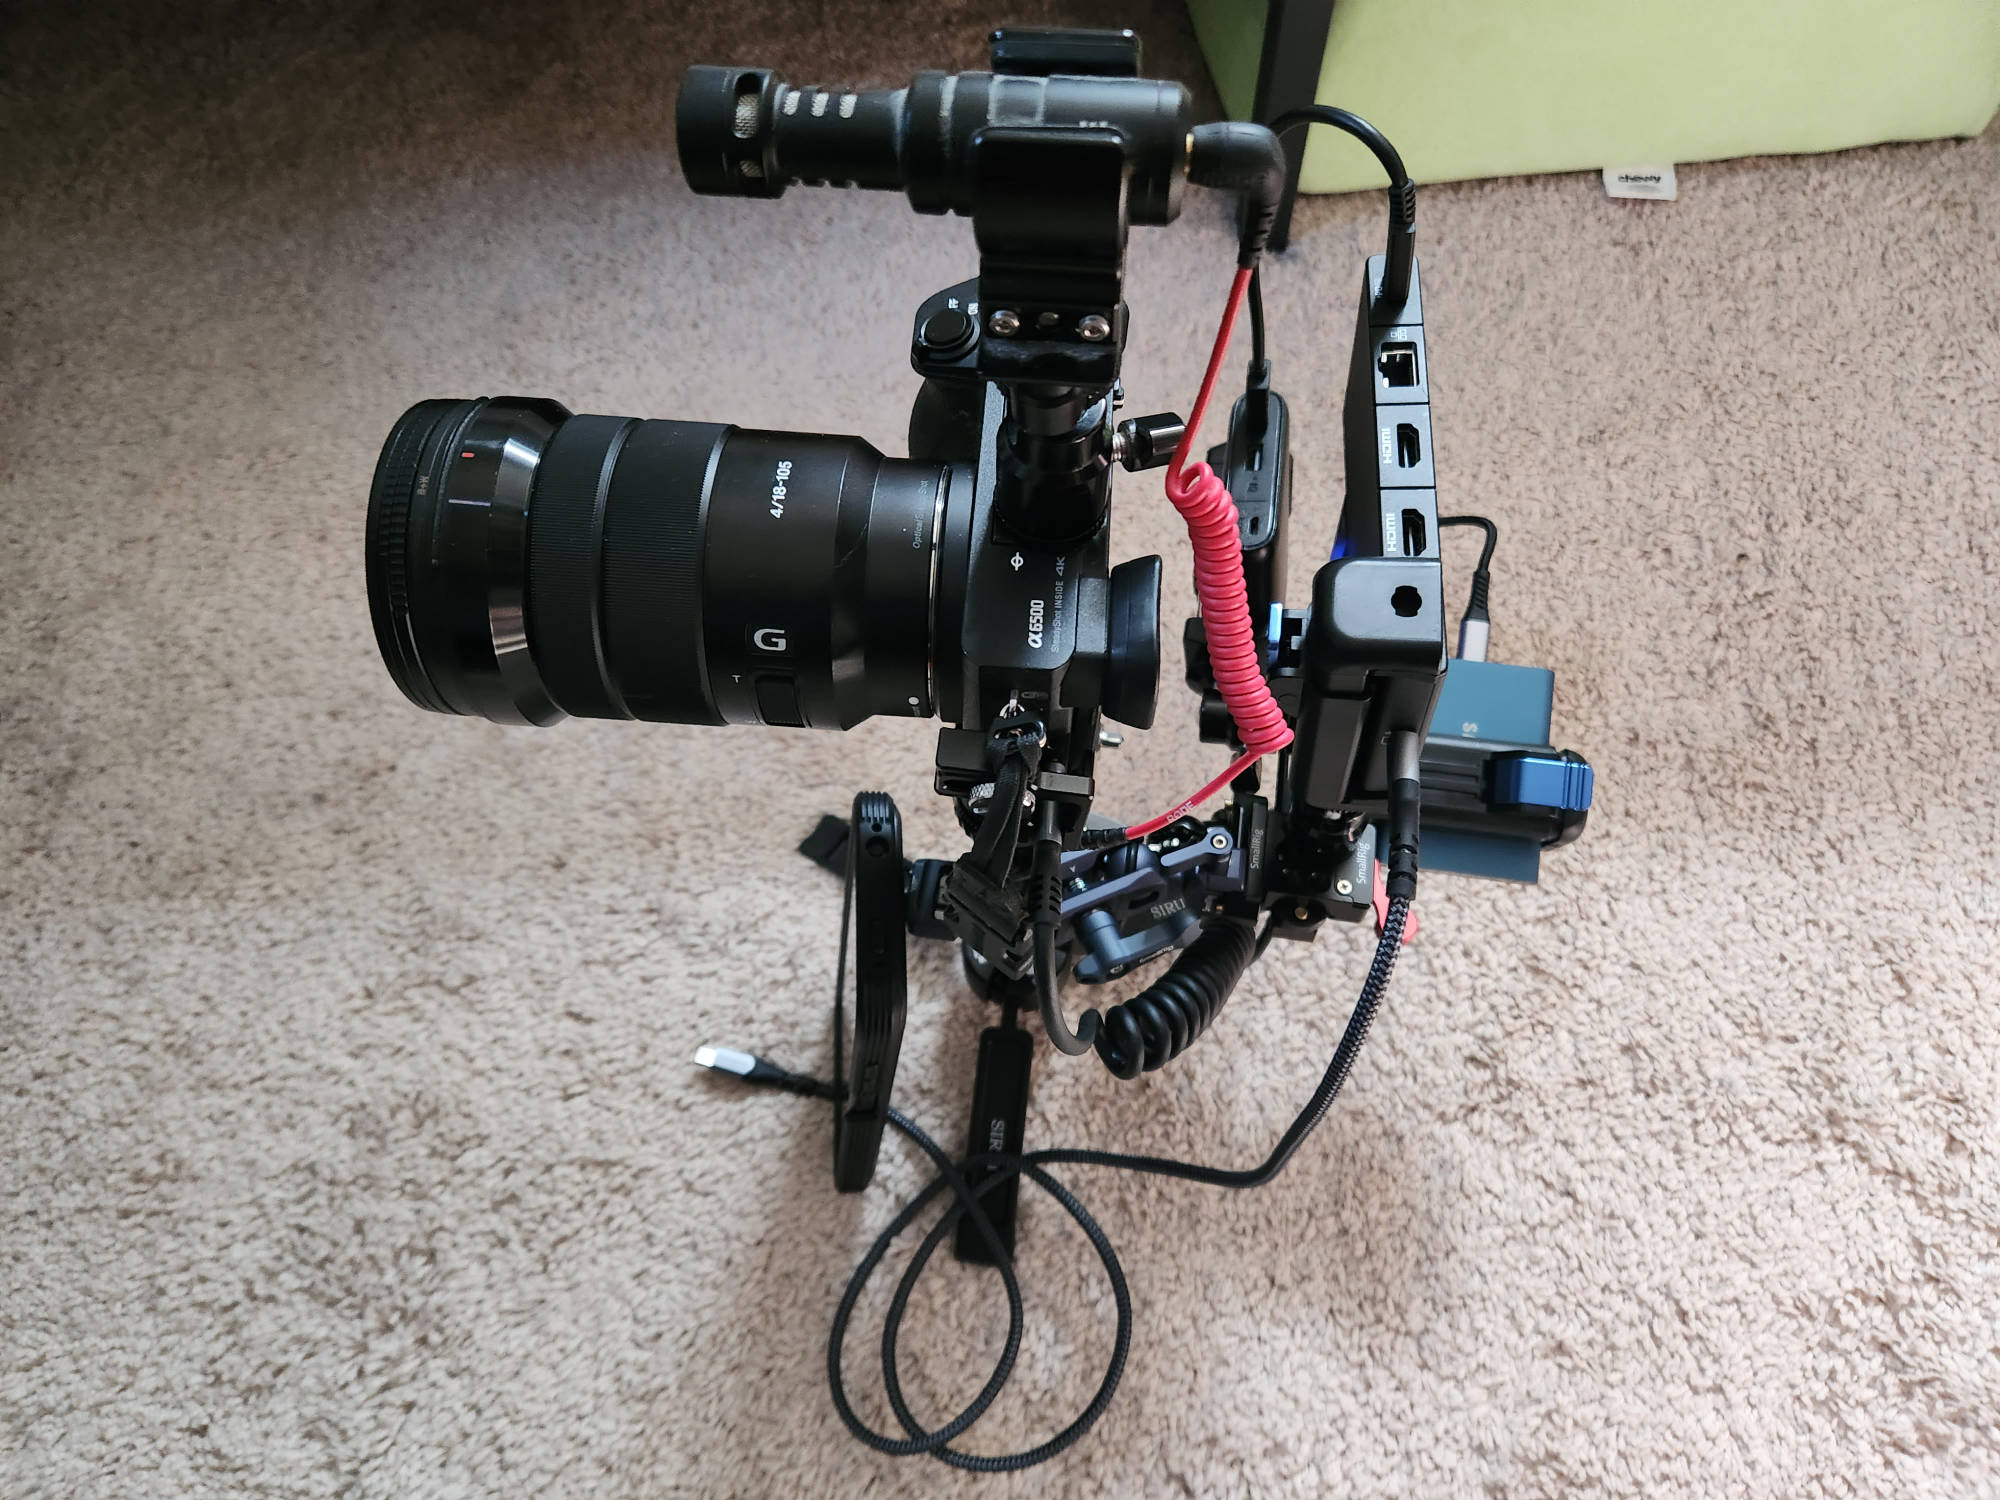
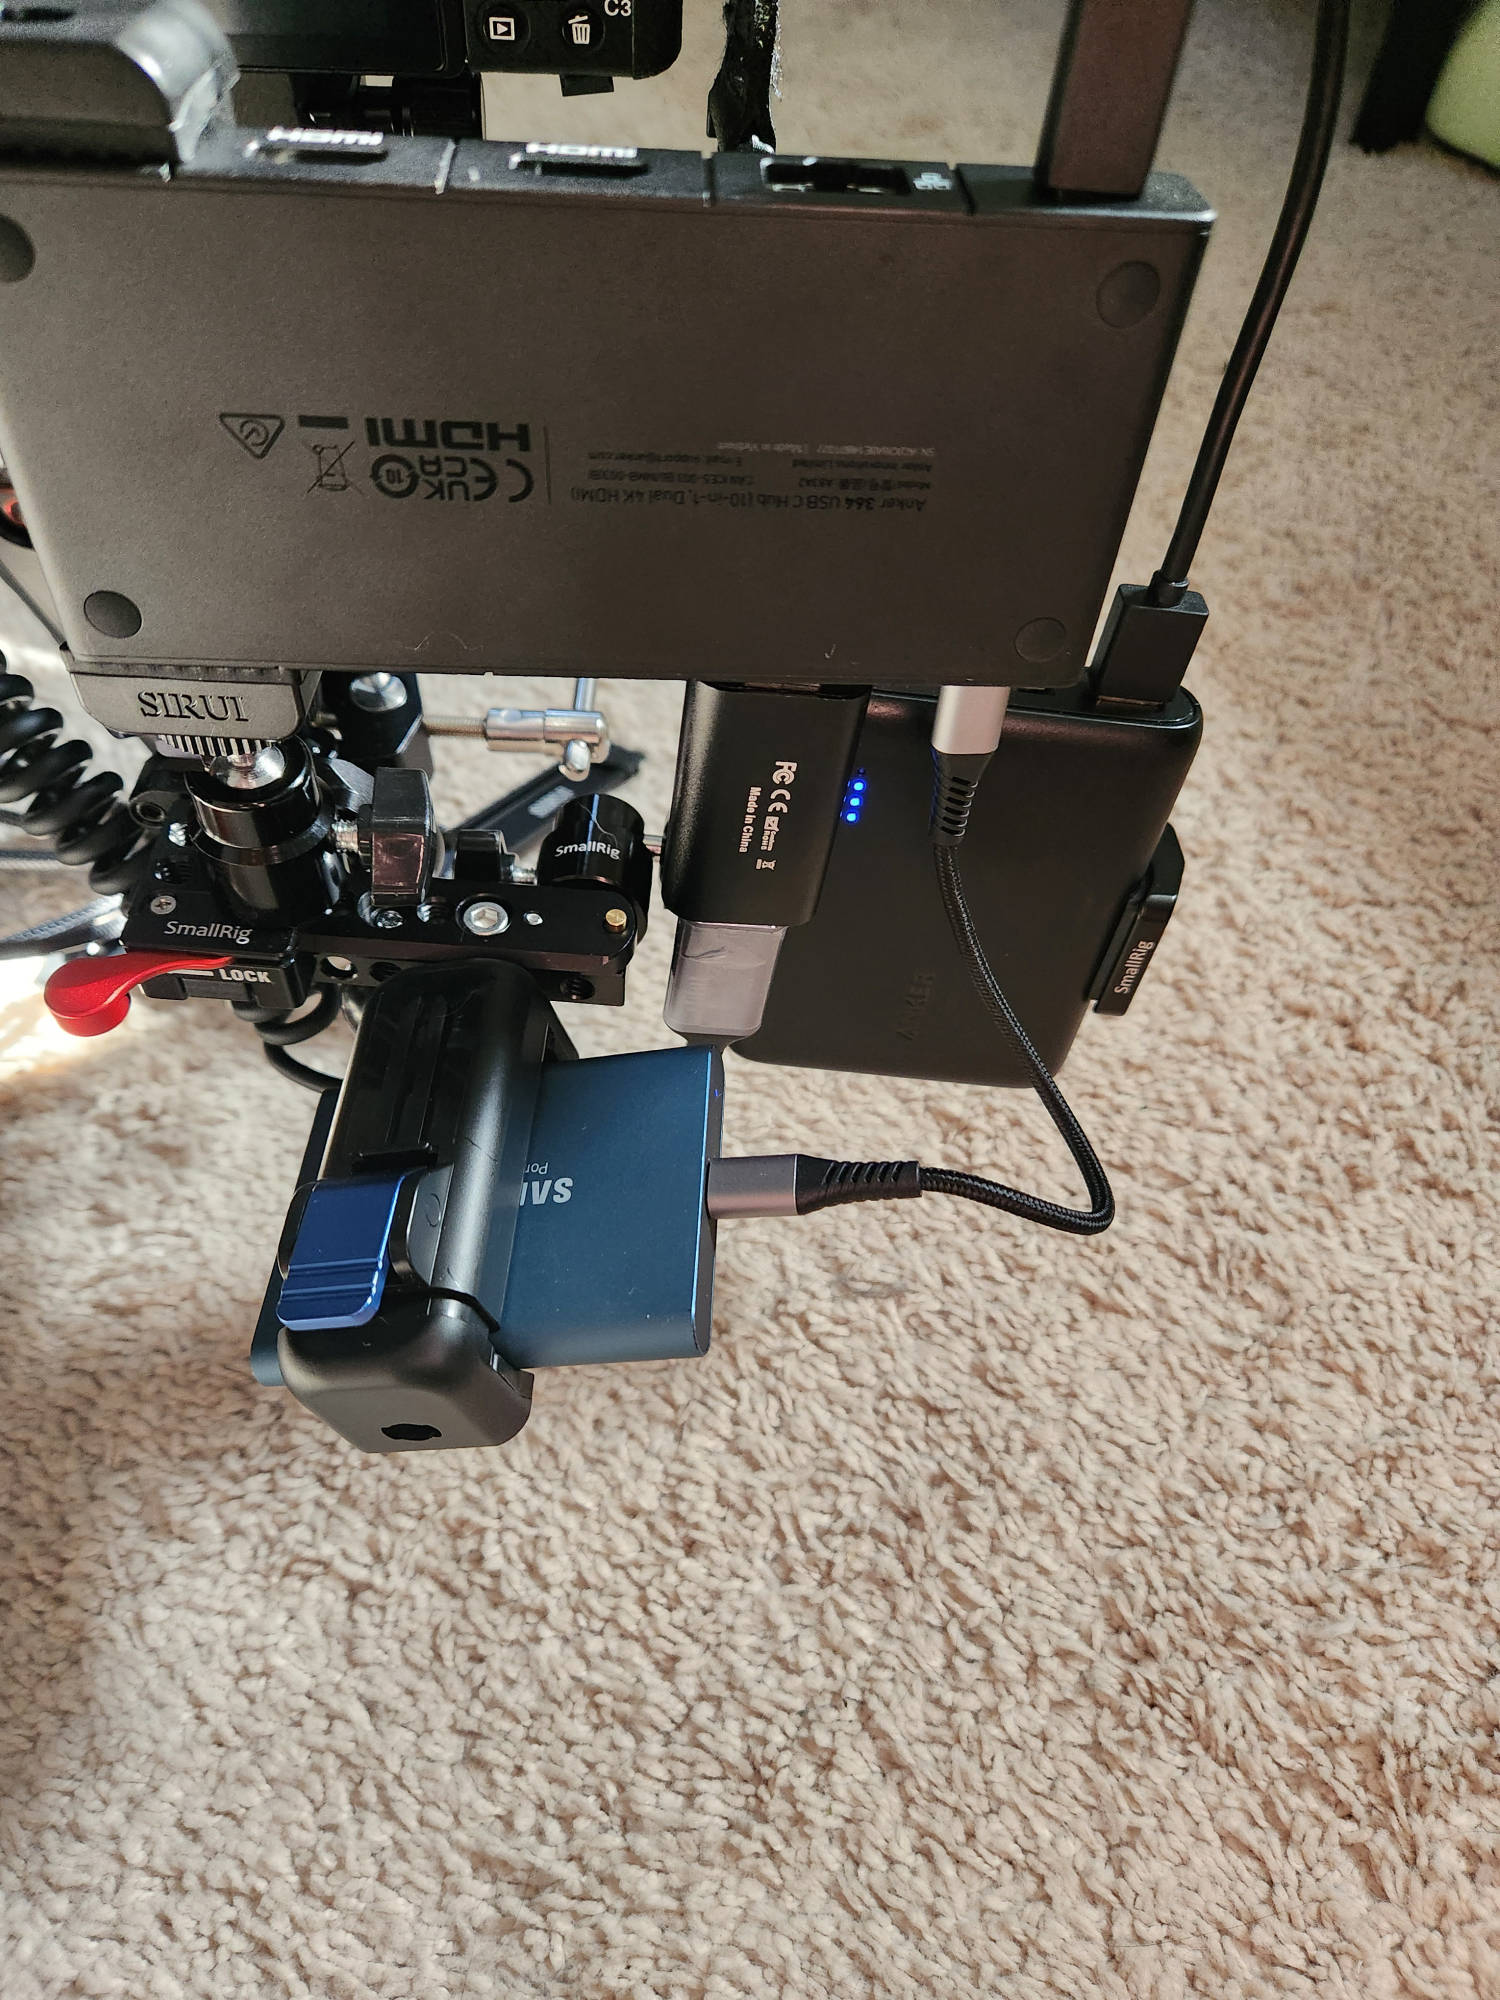
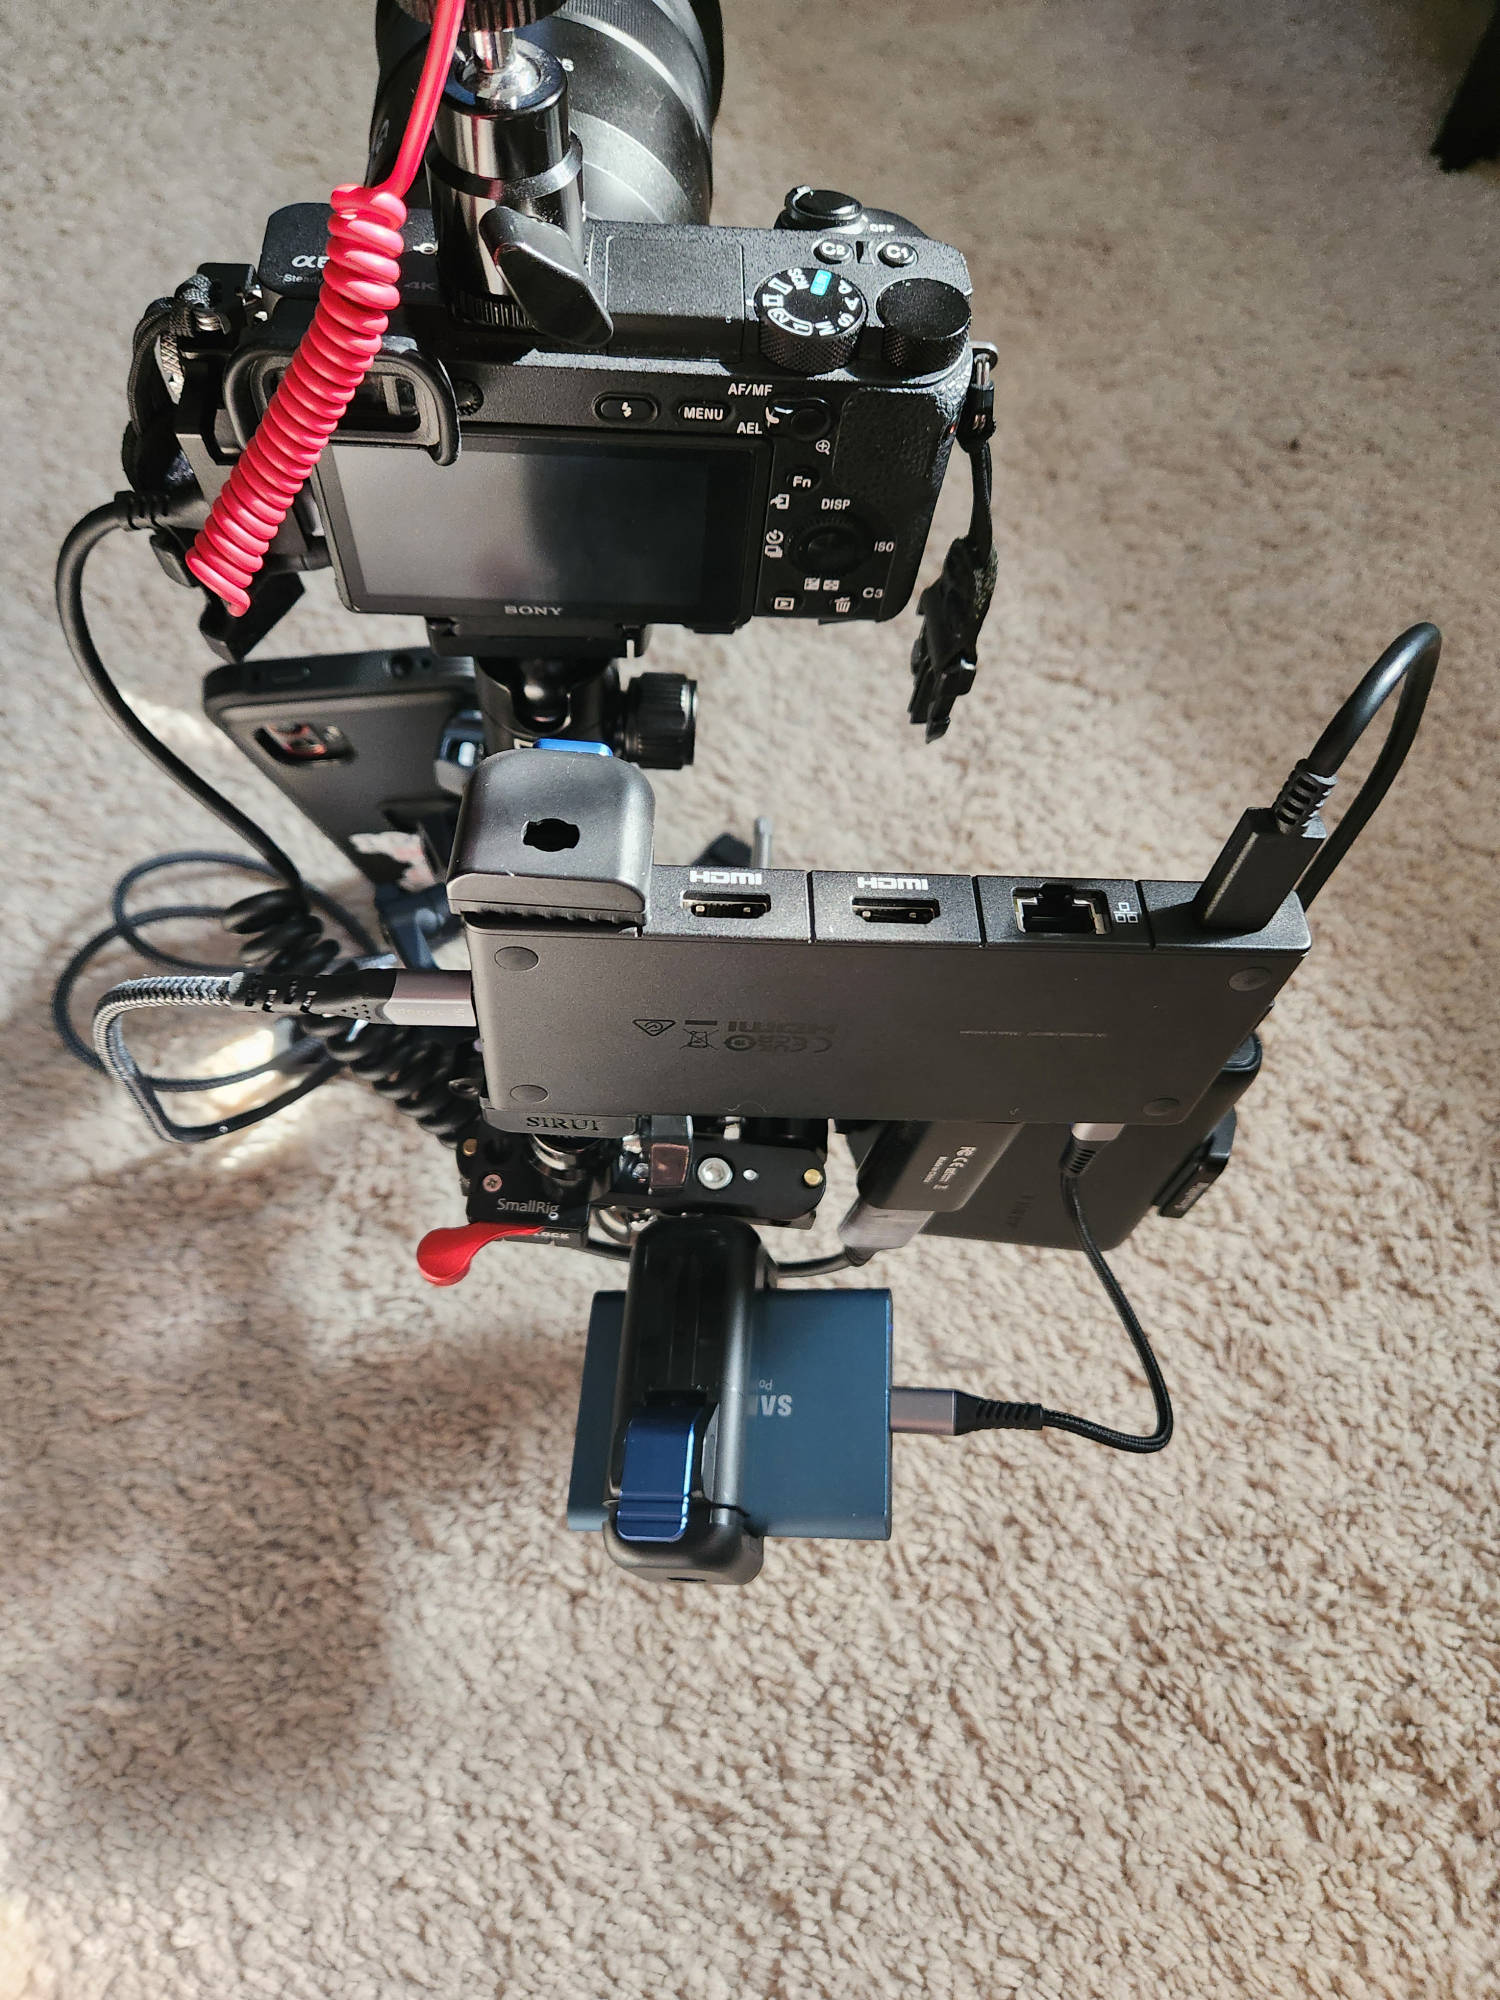
Example Modular Recording Setups Gallery
Please note: the gear shown in the pictures is not explicitly detailed in captions or alt text. The post’s main body has a breakdown of all kit shown in these photos. The photos are more for visual reference of the main post’s information.